Diagnosis
Save and reuse warranty terms
Write your warranty once, set a default, attach it to an invoice, and share one list across your team.
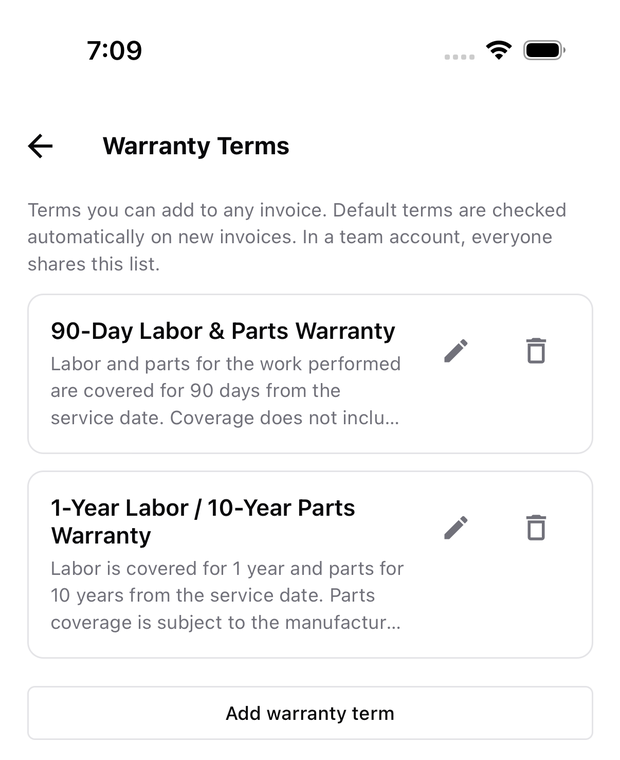
Warranty terms are saved pieces of text you can attach to any invoice, so you do not retype your coverage on every job.
Attach terms to an invoice
- Open the invoice from Job Documents and select Update Price.
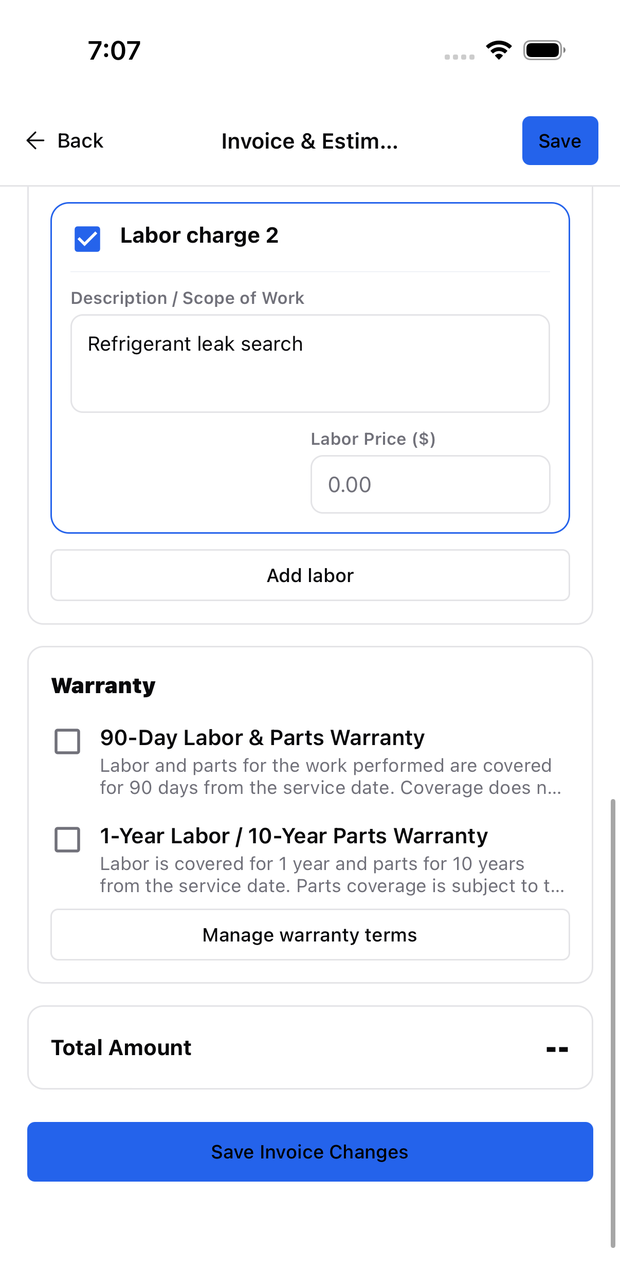
- Scroll to Warranty.
- Tick the terms you want on this invoice.
- Save.
The full text of the terms you ticked is printed at the bottom of the invoice and on the PDF.
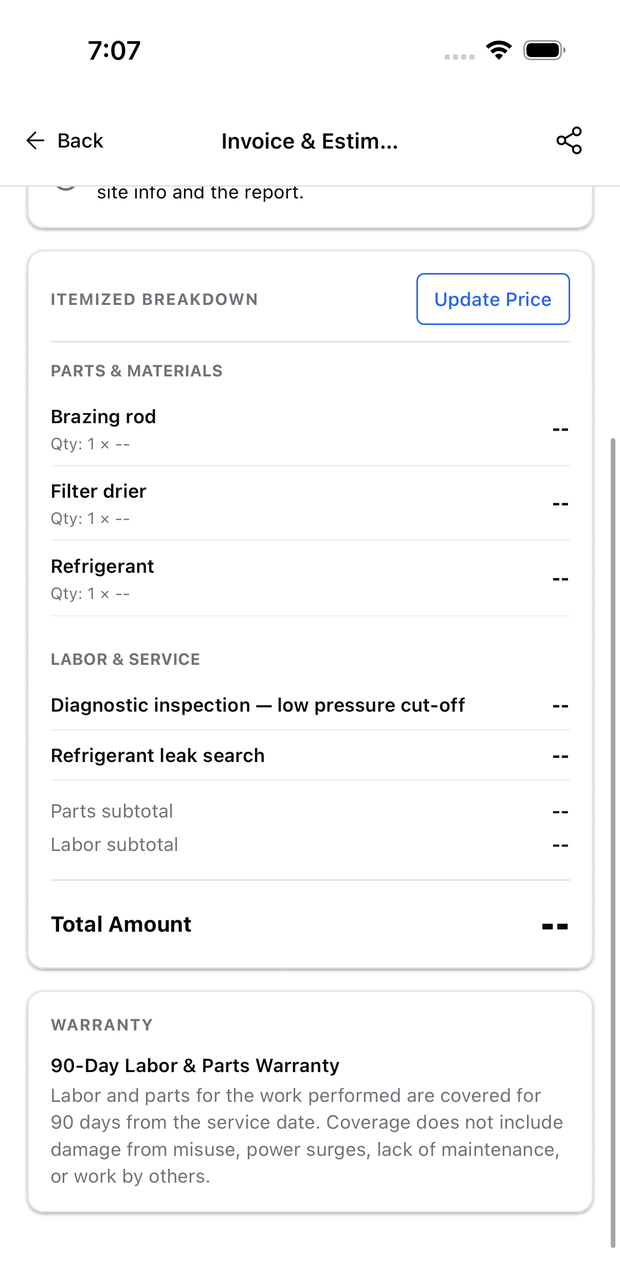
Untick the terms and save to take them off the document again.
Manage your list
Select Manage warranty terms from the invoice, or open Warranty Terms from the hub.
- Add warranty term — give it a title and the wording you want printed.
- Pencil — change the title or the wording of an existing term.
- Bin — delete it.
Set a default
Mark a term as the default and it is ticked automatically on every new invoice. You can still untick it on a job where it does not apply.
Starter templates
New accounts get two example terms — a 90-day labor and parts warranty and a 1-year labor / 10-year parts warranty — so you have something to edit rather than a blank list. They are examples, not legal advice: read them and rewrite them to match what your company actually offers.
Once you delete a starter template, it is not added back.
Team accounts
In an organization account, all active members share one warranty list. Anything an administrator adds is available to every technician, so everyone sends the same terms.
[!IMPORTANT] Editing a term does not change invoices that already have it. Each invoice keeps a copy of the wording as it was when you attached it, so a document you already sent stays exactly as the customer received it. To update an old invoice, untick the term and tick it again.
Related
Need support?
Email ACLogics with the issue details.
Include the account email, device model, app version if known, screenshots, and the exact message shown.